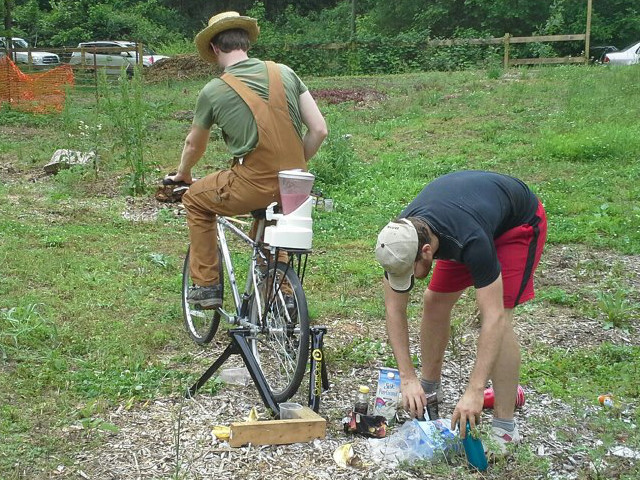
The bike blender

Katherine requested a bike blender a few months ago for mixing and selling margaritas at Chomp and Stomp. And it works! That’s always a nice bonus. Just get it spinning before you add solid ingredients.
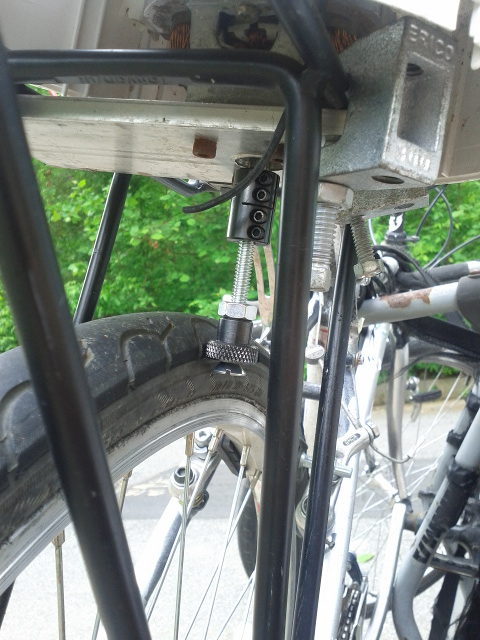
It’s a pretty simple design: the blender is bolted to an aluminum plate using the blender motor bolt holes. The aluminum plate provides some extra area for clamping the blender to a standard rear bike rack. A shaft coupling joins the blender shaft to a 1/4” flat head screw with a knurled knob threaded on to it. The blender is positioned and clamped so that the knurled knob presses against the rear tire and spins when the tire rotates.
The flat head screw was not ideal, but was the longest I had on-hand and does fine. Knurled knob is $5 off McMaster.
If you decide to make your own bike blender using this design, a few design tips:
- Use clamp-on shaft couplings, not setscrew couplings. The setscrew will work its way loose and can’t get enough purchase on the screw threads.
- The shaft coupling as-is doesn’t get much purchase on the screw threads. It eventually flatten the threads out and no longer hold. To prevent this, take your empty coupling and tighten the clamp bolts of one end until the coupling hole diameter is about 0.2” / 5mm (the size of a #7 drill, which is normally used for a 1/4”-20 hole). Cut threads in to this end with a standard 1/4”-20 tap. Tapping the coupling lets you thread your screw in and then tighten the clamp screws down for a super snug fit. My blender hasn’t had any mechanical problems in the many months since making this change.
- Things stay stable with the knurled knob on the driveside of the bike. Presumably putting it on the non-driveside will cause it eventually to unscrew and wander.