Making knurled bicycle rims for fun and ...

One of the first things I built was a machine to knurl the sidewalls of bicycle rims.
Why would anyone want to do this? Good question — it turns out no one really would. But I built it anyways. This is your guide to a useless machine.
During my undergrad years at Georgia Tech I had been pursuing tungsten carbide coatings on bicycle rims as a side project. This is something for which there is a legitimate application: trials riders need strong brakes, and they currently run an angle grinder against their rim sidewall to scuff it up and make it grabbier. This is stupid because aluminum (what most bicycle rims are made of) is a very soft metal, meaning the texture wears quickly and must be re-ground often. But the practice works and continues to this day.
Tungsten carbide (WC) coatings have been proven in the past — Plazmatic produced a WC-coated rim for trials riders in the late 90s, at a cost of $150-$200 a piece after you shipped in your wheel. My plan was to improve on this business model: sell pre-coated new rims. You get a new wheel, you don’t have to ship your old wheel in and wait, and you pay less because the coating operation can be done in bulk. Plus with my background in materials science and interest in the sport it was a shoe-in.
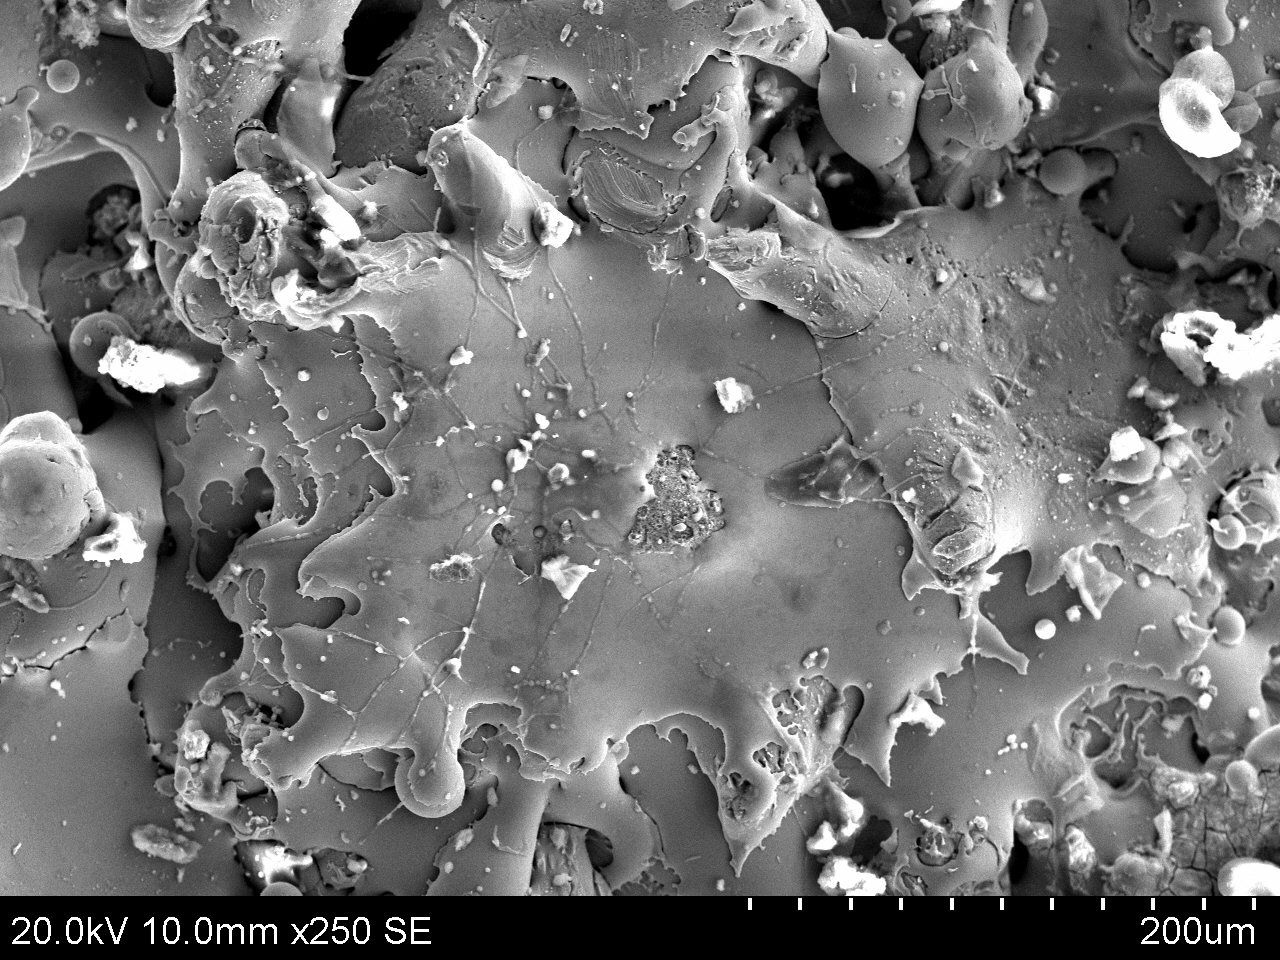
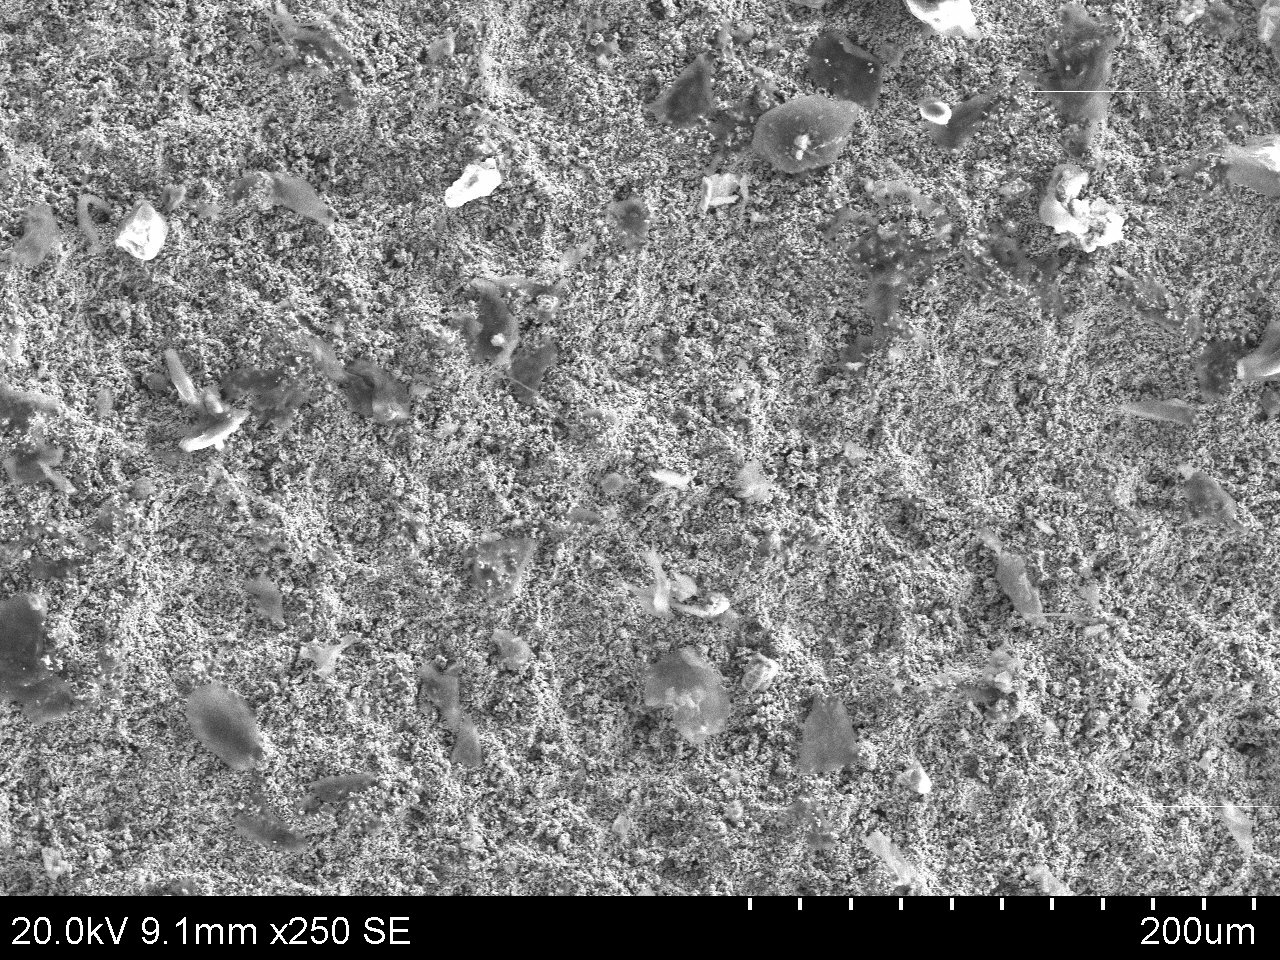
My initial experiments with the WC on rims would vary only how much the brake pads were shredded when the brakes slipped and didn’t provide any great increase in brake hold. Characterization of these coatings was particularly difficult, as their wear characteristics would change (sometimes within several hours of riding). Of the two images below, the first would grind brake pads to shreds. The second would work well, but would fade in performance quickly.
I began to think of a way I could quickly experiment with different rim textures for braking and began a long diversion down the path of knurling rims. Knurling is used for all kinds of grip applications, and if I could get the knurled texture just right, maybe I could spray a light coating of tungsten carbide on top of it and reduce its wear, sort of like titanium nitride coatings atop machine tools.
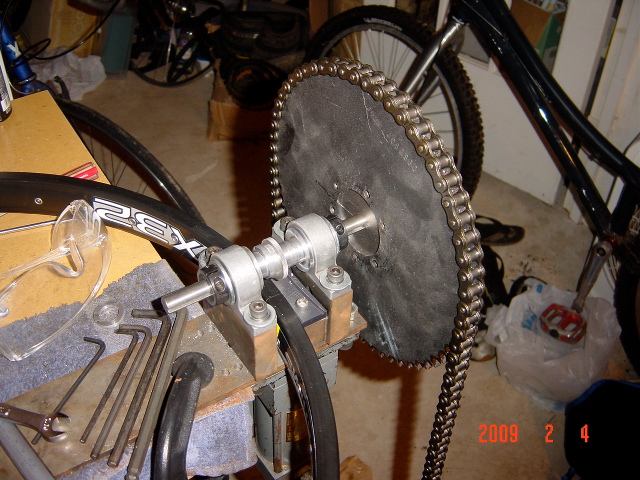
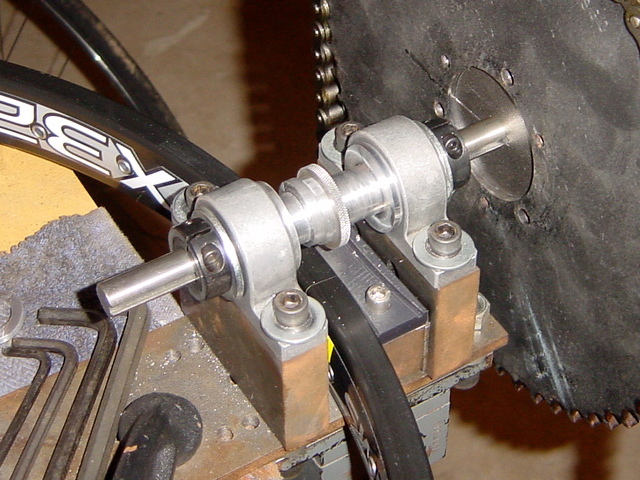
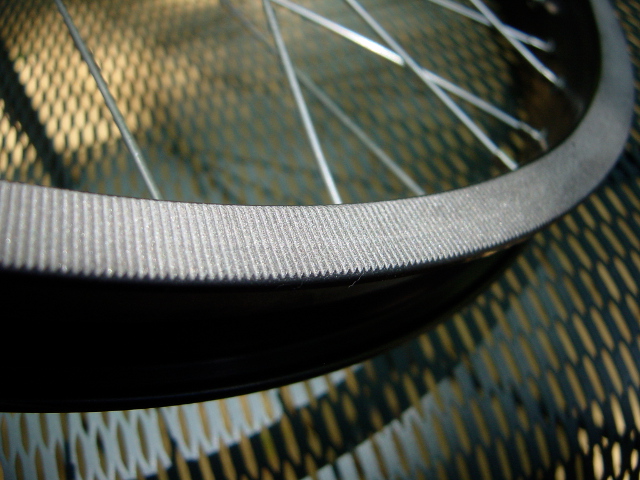
The final knurling machine. 1/2” keyed shaft, and knurls had a keyway EDM cut in them. The knurling wheel pictured in this image was EDM sliced in to 3 thin sections, so that rather than knurling a single 1/2” wide track it knurled 3 separate ~1/6” wide tracks. Why do it this way? If you’re knurling a surface of varying diameter (such as along the sidewall of a rim, or the knurl on the side of a toothpaste tube cap), one edge of the knurling wheel travels a slightly longer distance than the other, so you develop tracking errors. If the width of the knurl is smaller, the distance difference between knurling wheel edges is reduced (a neat trick learned from Model Engine News)
The rim sidewall sits on a piece of MDS-filled nylon with a groove cut in it to match the inside sidewall profile and curvature. The nylon is bolted to a steel ram, which in turn is connected to a hydraulic cylinder and manual hydraulic pump. Pressurize the ram (to about 700-900 psi) to press the knurling wheel. Turn the shaft and it would knurl and drive the rim at the same time. For convenience one could mount a bicycle in a trainer, attach the shaft cog chain over the front chainring of the bicycle, and knurl the rim by pedalling. Bikes making bike parts.
And ultimately it made them just fine. The problem is that a knurl is too regular of a surface to brake against. It’s peaks and valleys, but it’s identical peaks and valleys. It doesn’t really match the fine irregularity of someone manually brushing an angle grinder over the rim. So your knurled rim made a nice zipper sound when you braked, but it didn’t really do that much to stop you or hold you.
Straight knurl with light WC coating on top.
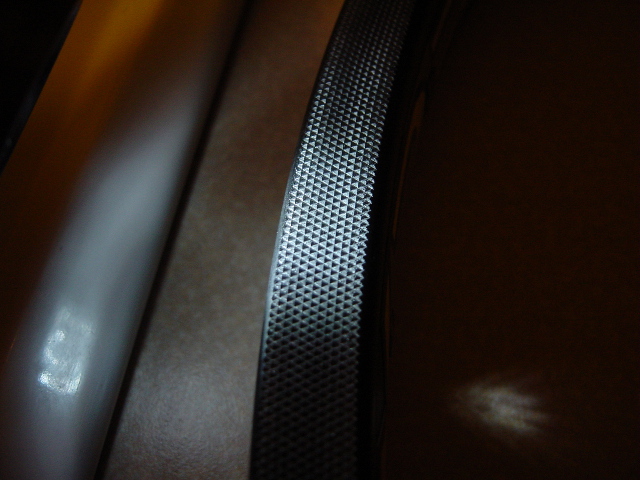
Bare diamond knurl.
Pretty sweet right? I don’t know what I was thinking.